
This is Part 1 of a 3-part series about building a full-stack blog app. See the full source code that inspired it on Github.
Now that this blog is live, I'd like to share a little of how I built it, in the hopes that it will inspire others to work on similar projects. This site is a Flutter web app running on a Dart Frog backend, fetching content from Butter CMS, and hosted on AWS App Runner and AWS Amplify. What follows is a brief tutorial based on how I built the app, with special attention to layered architecture patterns that streamline development and make future modifications easier.
Prerequisites
This tutorial requires the following:
- Flutter (installs both Flutter and the Dart SDK)
- Dart Frog
- Very Good CLI
- A free subscription to Butter CMS
- An AWS account
- A Github account
However, one of the key benefits of adopting layered architecture in a project like this is that you can swap out pieces as you need. I like Butter CMS, but if you wanted to adopt a different CMS, the majority of the app would be the same. Similarly, I'm using AWS because I'm an AWS Cloud Certified Practitioner, but if you wanted to, you could apply different cloud hosting in Google or Azure. Just follow the parts of the tutorial that work for you, and spin your own solutions for different layers!
A Note about Testing
I have completely drank the 100% test coverage Kool-Aid, and have written tests to cover all of what follows in my source code. That said, for this tutorial, I will not be sharing many code samples from the tests. If you chose to implement this (or something similar) yourself, you should do it with 100% test coverage. One of the big advantages of using Very Good CLI is that out of the box, it supports Very Good Workflows, which fail without 100% test coverage. There is also a mason brick you can install to automatically generate Very Good Workflows for every package. You can check out my test samples for inspiration. But before blindly copying the tests, I advise you to take a minute to try to understand what is being tests, and why. I think that one of the biggest challenges in software is understanding what your code does, and determining what needs to be tested based on your knowledge of the app.
Getting Started
The Very Good CLI provides an excellent starting point to any Dart or Flutter project. It's quick, easy, and lays a lot of groundwork for making a well-architected, well-tested project. To start, navigate to the directory where you want to store your project, and run the following terminal command:
very_good create flutter_app YOUR_APP_NAME_HERE
Then, navigate to the root of the app and create a Dart Frog api:
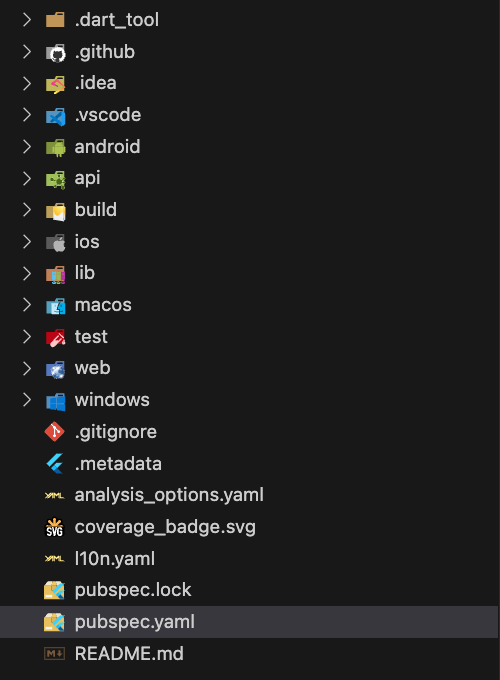
dart_frog create apiThis will create a Dart Frog api inside of your app. Your app directory should now look like this:
Building the API
Now that the scaffolding is set up, it's time to start building the API. Go ahead and create a packages directory inside api. Go to api/packages in your terminal and enter the following command to generate a models package:
very_good create dart_package blog_modelsOrganizing the models into a single package simplifies access to all necessary object models throughout the project. Any other part of the app that requires model access only needs to import the blog models package. Plus, since we are using json_serializable on the models that need serialization, it is nice to keep this dependency limited to a single place. The models are based on the data returned by the Butter CMS API:
data_models // core models necessary to construct other models
  author
  blog_meta
  blog_summary
  blog
  blogs_meta
  category
  tag
endpoint_models // representation of how blog data is returned by the API
  blog_response
  blogs_response
presentation_models // models used to present blog data on the frontend
  blog_detail
  blog_preview
In the interest of time, I won't go into detail on the specific code of the models, but you are welcome to check out more detail in my repo.
Once the models are good to go, the next step is to make a data client to enable the API to access Butter CMS. Navigate back to api/packages and create another Dart package:
very_good create dart_package butter_cms_clientThe client injects the necessary API key on creation, and sends http requests to the Butter endpoints. Add the http package, then insert the following into the file butter_cms_client.dart:
import 'package:http/http.dart';

/// {@template butter_cms_client}
/// Client to interact with the ButterCMS API.
/// {@endtemplate}
class ButterCmsClient {
  /// {@macro butter_cms_client}
  const ButterCmsClient({
    required Client httpClient,
    required String apiKey,
    String? baseUrl,
  })  : _httpClient = httpClient,
        _apiKey = apiKey,
        _baseUrl = baseUrl ?? 'api.buttercms.com';

  final Client _httpClient;
  final String _apiKey;
  final String _baseUrl;

  /// Fetches a list of blog posts from the ButterCMS API.
  Future<Response> fetchBlogPosts({
    bool excludeBody = false,
  }) async {
    final queryParameters = <String, dynamic>{
      'auth_token': _apiKey,
    };

    if (excludeBody) {
      queryParameters['exclude_body'] = 'true';
    }

    final uri = Uri.https(_baseUrl, '/v2/posts', queryParameters);

    return _httpClient.get(uri);
  }

  /// Fetches a single blog post from the ButterCMS API,
  /// given a unique [slug].
  Future<Response> fetchBlogPost({required String slug}) async {
    final queryParameters = <String, dynamic>{
      'auth_token': _apiKey,
    };

    final uri = Uri.https(_baseUrl, '/v2/posts/$slug', queryParameters);

    return _httpClient.get(uri);
  }
}
Note that fetchBlogPosts has an optional excludeBody flag. This flag is to improve performance when fetching a list of blogs for preview purposes by not delivering the body content (which is instead delivered on a detail page). There are additional parameters that you could also pass for pagination and filtering, as well.
Once the blog_models and butter_cms_client packages are complete (don't forget to make tests for each project!), it's time to make some routes. Dart Frog constructs routes based on project directory. So head on over to api/routes and create a new folder titled blogs. Within this directory, create two new files: index.dart and [slug].dart. These files will correspond to the endpoints blogs and blogs/[slug], respectively. These route files simply call the Butter CMS Client to fetch data and return it in a Response object. index.dart calls the fetchBlogPosts to get a list of blog previews for the home page:
import 'package:butter_cms_client/butter_cms_client.dart';
import 'package:dart_frog/dart_frog.dart';

/// Request handler for the `/blogs` route.
/// Supports GET requests.
Future<Response> onRequest(RequestContext context) async {
  return switch (context.request.method) {
    HttpMethod.get => await _get(context),
    _ => Response(statusCode: 405, body: 'Method Not Allowed'),
  };
}

Future<Response> _get(RequestContext context) async {
  final blogsResponse = await context.read<ButterCmsClient>().fetchBlogPosts(
        excludeBody: true,
      );

  return Response(
    statusCode: blogsResponse.statusCode,
    body: blogsResponse.body,
  );
}
[slug].dart looks very similar, but calls fetchBlogPost and passes a slug to get a detail view of an individual blog object:
import 'package:butter_cms_client/butter_cms_client.dart';
import 'package:dart_frog/dart_frog.dart';

/// Request handler for the `/blogs/{slug}` route.
/// Supports GET requests.
Future<Response> onRequest(RequestContext context, String slug) async {
  return switch (context.request.method) {
    HttpMethod.get => await _get(context, slug),
    _ => Response(statusCode: 405, body: 'Method Not Allowed'),
  };
}

Future<Response> _get(RequestContext context, String slug) async {
  final blogResponse =
      await context.read<ButterCmsClient>().fetchBlogPost(slug: slug);

  return Response(
    statusCode: blogResponse.statusCode,
    body: blogResponse.body,
  );
}
There is one more thing we need to do for these routes. You may have noticed that we are reading ButterCmsClient from context. This is possible because Dart Frog middleware injects the necessary dependencies into context before the requests are executed. So, in the root of the routes directory, add a file called _middleware.dart:
import 'dart:convert';
import 'dart:io';

import 'package:butter_cms_client/butter_cms_client.dart';
import 'package:dart_frog/dart_frog.dart';
import 'package:http/http.dart';
import 'package:shelf_cors_headers/shelf_cors_headers.dart';

Handler middleware(Handler handler) {
  return handler.use(requestLogger()).use(
    provider<ButterCmsClient>(
      (_) {
        final secretJson = Platform.environment['BUTTER_CMS_API_KEY'];

        if (secretJson == null) {
          throw StateError('Could not fetch secret BUTTER_CMS_API_KEY');
        }

        final secret = jsonDecode(secretJson) as Map<String, dynamic>;
        final apiKey = secret['BUTTER_CMS_API_KEY'] as String?;

        if (apiKey == null) {
          throw StateError('Could not resolve apiKey value from secret');
        }

        return ButterCmsClient(
          httpClient: Client(),
          apiKey: apiKey,
        );
      },
    ),
  ).use(
    fromShelfMiddleware(
      corsHeaders(
        headers: {
          ACCESS_CONTROL_ALLOW_ORIGIN:
              Platform.environment['CORS_ALLOW_ORIGIN'] ?? '',
        },
      ),
    ),
  );
}
Note the use of environment variables to store API key and CORS origin on the server. This helps us to keep secret values more secure by not exposing them to the frontend, and is one of the key benefits of making our own API. For now, we'll just define these environment variables via the command line. To test the API, run the following command from the api directory:
export BUTTER_CMS_API_KEY='{"BUTTER_CMS_API_KEY":"YOUR-API-KEY"}' && export CORS_ALLOW_ORIGIN='*' && dart_frog devThe API is now running on http://localhost/8080. Open up your favorite API tool (e.g., Postman) and make a GET request to http://localhost:8080/blogs. If everything is set up right, you should get back a JSON object containing metadata and an array of posts that only contains one post (Butter's default blog post). Check that default blog for its slug (should be example-post), and then make a request to http://localhost:8080/blogs/{slug}. You should get back a JSON object with metadata and a single blog post object.
If you've made it this far, congratulations! You've set up a Dart API that connects to Butter CMS and provides blog content. Now it's time to make the Flutter web app!